AVN Head Unit
| •
|
Take care not to scratch the center
fascia panel and related
parts. |
| •
|
Eject all the disc before removing the
AVN head unit to prevent damaging the CD player's load
mechanism. | |
| 1. |
Disconnect the negative (-) battery
terminal. |
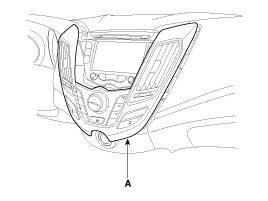
| 2. |
Remove the center fascia panel
(A).
|
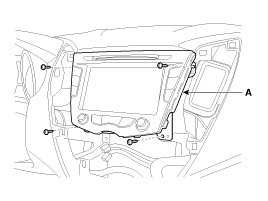
| 3. |
Disconnect the connectors (A) from center
fascia panel.
|
| 4. |
Remove the AVN head unit assembly (A), after
loosening the 4 screws.
|
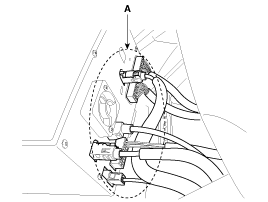
| 5. |
Disconnect the AVN head unit connectors and
antenna cables (A), then remove the AVN head unit.
|
If the CD does not eject, do not attempt
to remove it because the audio unit may be damaged.Contact an
authorized hyundai dealership for
assistance. | |
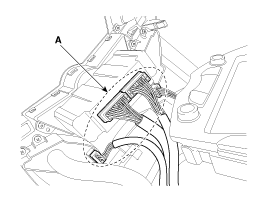
External Amplifier
| 1. |
Remover the assistant seat.
(Refer to the BD group - "Seat - Front
seat") |
| 2. |
Disconnect the external amplifier
connector. |
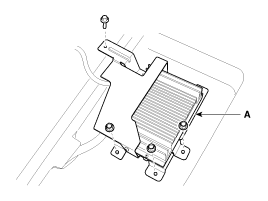
| 3. |
Loosen a bolt and 3 nuts, then remove the
external amplifier (A).
|
AVN Head Unit
| 1. |
Connect the AVN head unit connectors and
cables. |
| 2. |
Install the AVN head
unit. |
| 3. |
Install the center fascia upper
panel. |
| 4. |
Connect the negative (-) battery
terminal.
|
Make sure the AVN head unit connectors
are plugged in properly and the antenna cable is connected
properly. | |
External Amplifier
| 1. |
Connect the connector and install the external
amplifier. |
| 2. |
Install the assistant
seat. | |