| 1. |
Disconnect the negative (-) battery
terminal. |
| 2. |
Recover the refrigerant with a recovery/
recycling/ charging station. |
| 3. |
When the engine is cool, drain the engine
coolant from the radiator. |
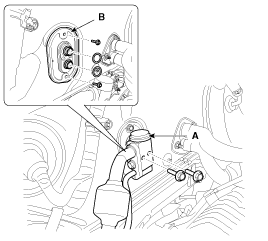
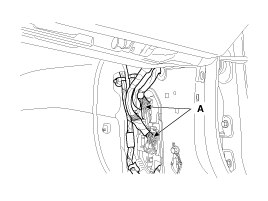
| 4. |
Remove the expansion valve (A) from the
evaporator core and then remove the cover (B).
Tightening
torque :
7.8 ~ 11.7 N.m ( 0.8 ~ 1.2 kgf.m, 5.7 ~
8.6 Ib-ft)
|
|
Plug or cap the lines immediately after
disconnecting them to avoid moisture and dust
contamination. | |
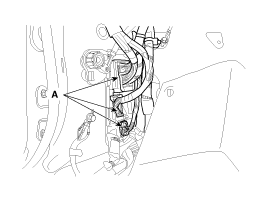
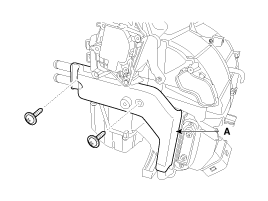
| 5. |
Disconnect the inlet (A) and outlet (B) heater
hoses from the heater unit and then remove the cover
(C).
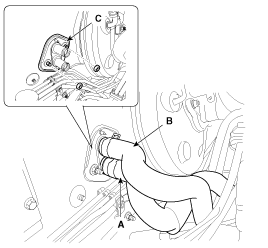
|
Engine coolant will run out when the
hoses are disconnected; drain it into a clean drip pan. Be
sure not to let coolant spill on electrical parts or painted
surfaces. If any coolant spills, rinse it off
immediately. | |
| 6. |
Remove the center console.
(Refer to BD group - "Center
Console") |
| 7. |
Remove the steering handle and
column.
(Refer to ST group - "Steering
Column") |
| 8. |
Remove the cowl top cover.
(Refer to BD group - "Cowl Top
Cover") |
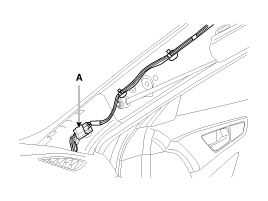
| 9. |
Remove the photo sensor.
(Refer to HA group - "Photo
Senosr") |
| 10. |
Loosen the cowl cross member mounting bolts
(A).
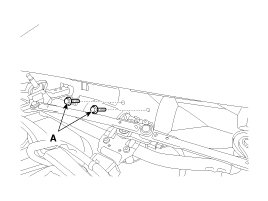
|
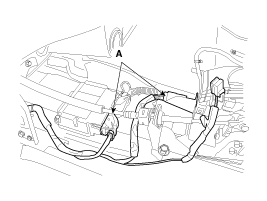
| 11. |
Remove the left & right front filler trim
and than disconnect the connectors (A).

|
| 12. |
Disconnect the left & right multi box
connectors (A).
|
| 13. |
Disconnect the main fuse box connectros
(A).
|
| 14. |
Disconnect the air bag connectors
(A).
|
| 15. |
Remove the center facia panel
(A).
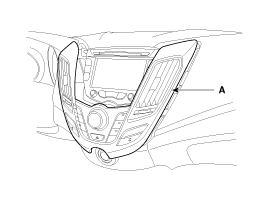
|
| 16. |
Loosen the heater & blower unit mounting
bolt (A).
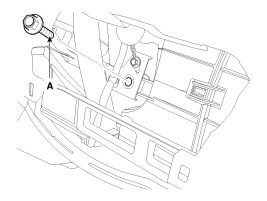
|
| 17. |
Loosen the heater & blower unit mounting
bolts (A).
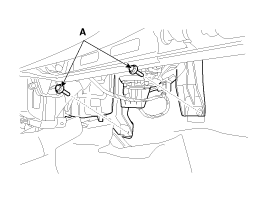
|
| 18. |
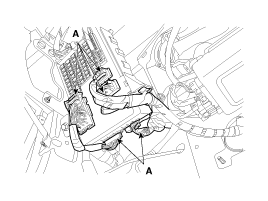
Loosen the cowl cross member mounting bolts
(A) and then remove the crash pad and heater & blower unit
assembly (B).
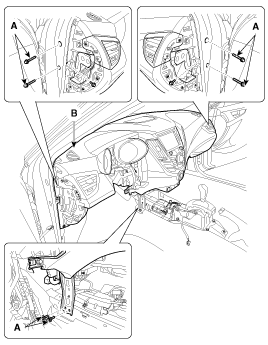
|
| 19. |
Disconnect the connectors and then remove the
heater & blower unit (A) from the crash pad.
|
| 20. |
Remove the blower unit (A) from heater unit
after loosening screws.
|
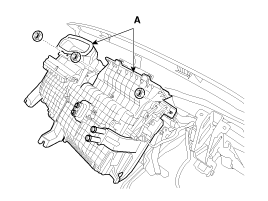
| 21. |
Loosen the mounting screws and then remove the
heater core cover (A).
|
| 22. |
Disconnect the heater core (A) from heater
unit.
|
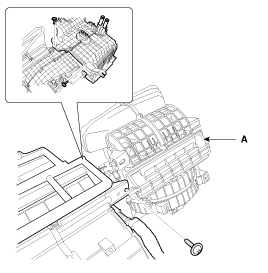
| 23. |
Loosen the heater unit lower case mount screws
and then remove the heater unit lower case (A).
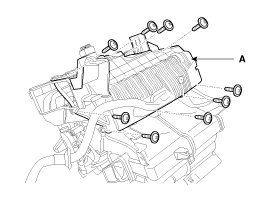
|
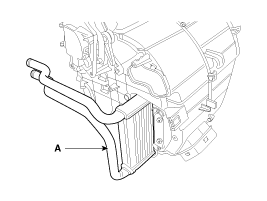
| 24. |
Remove the evaporator core (A).
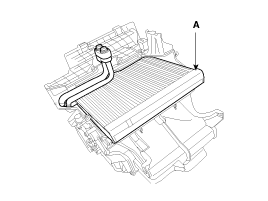
|
Be careful that the inlet and outlet
pipe are not bent during heater core removal, and pull out the
heater
core. | |
| 25. |
Installation is the reverse order of
removal.
| -
|
If you're installing a new
evaporator, add refrigerant oil (PAG
OIL). |
| -
|
Replace the O-rings with new ones
at each fitting, and apply a thin coat of refrigerant
oil before installing them. Be sure to use the right
O-rings for R-134a to avoid
leakage. |
| -
|
Immediately after using the oil,
replace the cap on the container, and seal it to avoid
moisture absorption. |
| -
|
Do not spill the refrigerant oil
on the vehicle ; it may damage the paint ; if the
refrigerant oil contacts the paint, wash it off
immediately |
| -
|
Apply sealant to the
grommets. |
| -
|
Make sure that there is no air
leakage. |
| -
|
Charge the system and test its
performance. |
| -
|
Do not interchange the inlet and
outlet heater hoses and install the hose clamps
securely. |
| -
|
Refill the cooling system with
engine
coolant | | | |