Hood Assembly Replacement
| •
|
When removing and installing the hood,
an assistant is necessary. |
| •
|
Take care not to damaged the hood and
body. | |
| 1. |
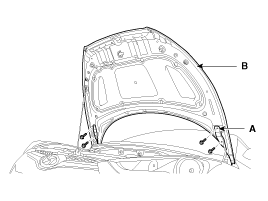
After loosening the hood hinge (A) mounting
bolts, and then remove the hood (B).
Tighening
torque :
21.6 ~ 26.5 N.m (2.2 ~ 2.7 kgf.m, 15.9 ~
19.5 lb-ft)
|
|
| 2. |
Installation is the reverse of
removal.
| •
|
Make sure the hood opens properly
and locks securely. |
| •
|
Adjust the hood
alignment. | | |
Hood Insulator Pad Replacement
| 1. |
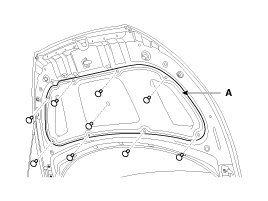
Using a clip remover, detach the clips, and
remove the hood insulator pad (A).
| •
|
Be careful not to scratch the hood
panel.
| |
|
| 2. |
Installation is the reverse of
removal.
| •
|
Replace any damaged clips.
| | |
Hood Weatherstrip Replacement
| 1. |
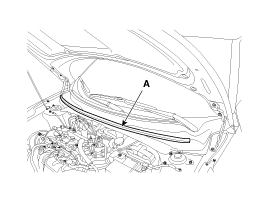
Remove the hood weatherstrip (A).
| •
|
Take care not to scratch the hood
weatherstrip. | |
|
| 2. |
Installation is the reverse of
removal. |
Hood Latch Release Handle Replacement
| 1. |
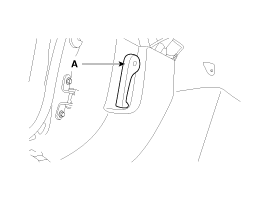
Using a screwdriver or remover, remove the
hood latch release handle (A).
|
| 2. |
Installation is the reverse of
removal.
| •
|
Make sure the hood latch cable is
connected properly. |
| •
|
Make sure the hood locks
securely. | | |
Hood Latch Replacement
| 1. |
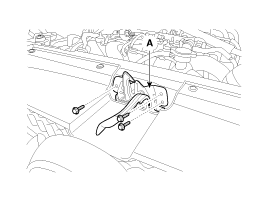
Remove the hood latch (A) mounting
bolts.
Tighening
torque :
7.8 ~ 11.8N.m (0.8 ~ 1.2kgf.m, 5.8 ~8.7
lb-ft)
|
|
| 2. |
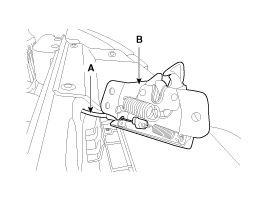
Disconnect the hood latch release handle cable
(A) and remove the hood latch (B).
|
| 3. |
Installation is the reverse of
removal.
| •
|
Make sure the hood latch release
cable is connected
properly. |
| •
|
Make sure the hood locks/unlocks
and opens/closes properly.
|
| •
|
Adjust the latch alignment.
| | |
Hood Adjustment
| 1. |
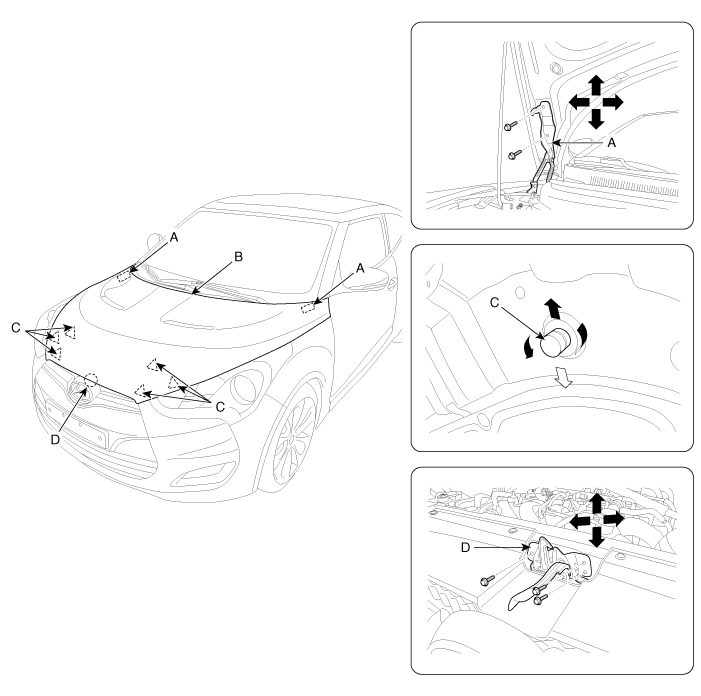
After loosening the hinge (A) mounting bolt,
adjust the hood (B) by moving it front or rear, or right or
left. |
| 2. |
Adjust the hood height by turning the hood
over slam bumpers (C). |
| 3. |
After loosening the hood latch (D) mounting
bolts and nuts, adjust the latch by moving it up or down, or right
or left.
|