Tail Gate Assembly Replacement
| •
|
When removing and installing the tail
gate, an assistant is
necessary. |
| •
|
Take care not to damaged the tail gate
and body.
| |
| 1. |
Remove the following items.
| A. |
Tail gate frame upper trim & Tail
gate center trim |
| C. |
Tail gate frame side
trim | |
| 2. |
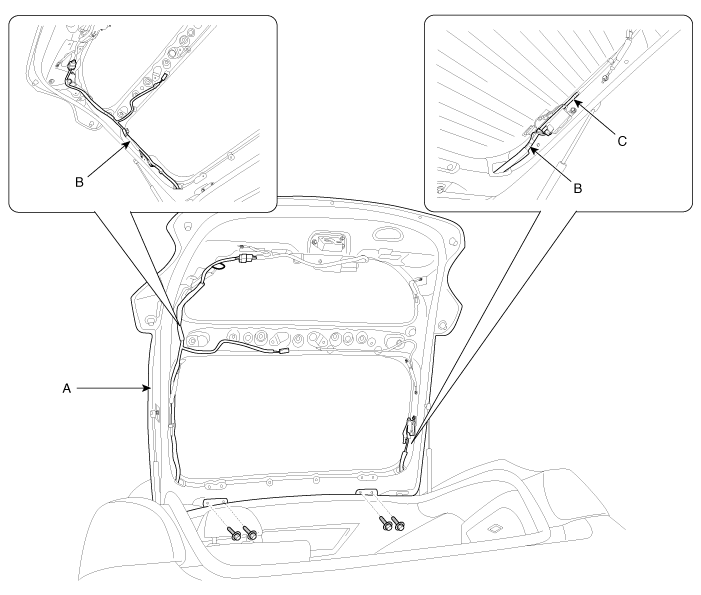
Remove the washer nozzle hose
(C). |
| 3. |
Disconnect the connectors and tail gate wiring
harness (B). |
| 4. |
After loosening the mounting bolts, then
remove the tail gate assembly (A).
Tightening
torque :
21.6 ~ 26.5 N.m (2.2 ~ 2.7 kgf.m, 15.9 ~
19.5 lb-ft)
|
|
| 5. |
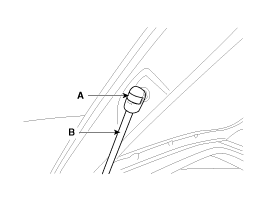
Using a screwdriver, lift the socket clips (A)
up slightly on both ends of the tail gate lifter (B).
|
| 6. |
Installation is the reverse of
removal.
| •
|
Make sure the tail gate opens
properly and locks
securely. |
| •
|
Adjust the tail gate alignment.
|
| •
|
Make sure the connectors are
connected in properly. |
| •
|
Replace any damage clips.
| | |
Tail Gate Trim Replacement
| •
|
When prying with a flat-tip screwdriver,
wrap it with protective tape, and apply protective tape around
the related parts, to prevent
damage. |
| •
|
Put on gloves to protect your hands.
| |
| 1. |
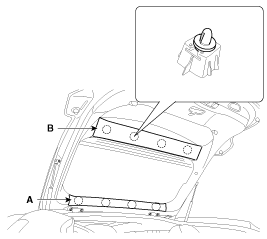
Using a screwdriver or remover, remove the
tail gate frame upper trim (A) and tail gate center trim
(B).
|
| 2. |
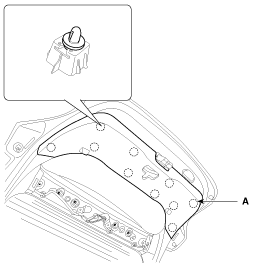
Using a screwdriver or remover, remove the
tail gate trim (A).
|
| 3. |
After loosening the mounting screws, then
remove the tail gate frame side trim (A).
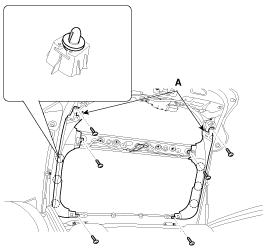
|
| 4. |
Installation is the reverse of
removal.
| •
|
Make sure the tail gate opens
properly and locks
securely. |
| •
|
Replace any damaged clips.
| | |
Tail Gate Latch Replacement
| •
|
When prying with a flat-tip screwdriver,
wrap it with protective tape, and apply protective tape around
the related parts, to prevent
damage. |
| •
|
Put on gloves to protect your hands.
| |
| 1. |
Remove the following items:
|
| 2. |
Disconnect the tail gate latch connector
(A).
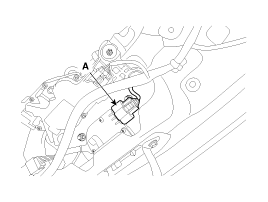
|
| 3. |
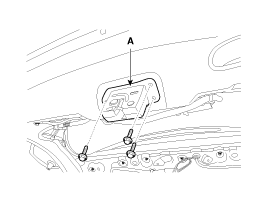
After loosening the mounting bolts, then
remove the tail gate latch assembly (A).
Tightening
torque :
6.9 ~ 10.8N.m (0.7 ~ 1.1kgf.m, 5.1 ~ 8.0
lb-ft)
|
|
| 4. |
Installation is the reverse of
removal
| •
|
Make sure the tail gate opens
properly and locks
securely. |
| •
|
Make sure the connector is
connected properly and the connecting rod is connected
properly. |
| •
|
Replace any damaged clips.
| | |
Tail Gate Outside Handle Replacement
| •
|
When prying with a flat-tip screwdriver,
wrap it with protective tape, and apply protective tape around
the related parts, to prevent
damage. |
| •
|
Put on gloves to protect your hands.
| |
| 1. |
Remove the following items:
|
| 2. |
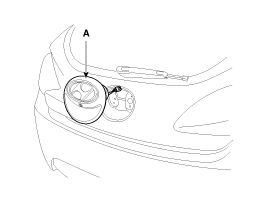
Disconnect the tail gate outside handle
connector (A). |
| 3. |
Loosen the tail gate outside handle mounting
nuts.
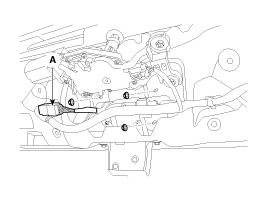
|
| 4. |
Remove the tail gate outside handle
(A).
|
| 5. |
Installation is the reverse of
removal
| •
|
Make sure the tail gate
locks/unlocks and opens/closes properly.
|
| •
|
Make sure connectors are connected
properly and each rod is connected securely.
|
| •
|
Replace any damaged clips.
| | |
Tail Gate Lift Replacement
| •
|
Take care to not let the tailgate fall
on you as the lifts are removed. Have a helper hold the
tailgate open, or use a secure method to hold it
open. | |
| 1. |
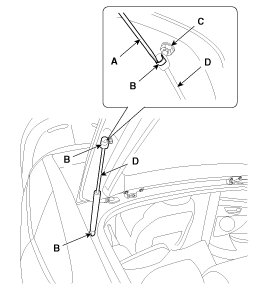
Using a screwdriver (A), lift up slightly the
socket clips (B) of both ends on the lifter (D), and then remove the
lifter from the bracket (C).
|
| 2. |
Push the socket of the lifter into the bracket
for installation.
| •
|
Make sure the tail gate locks and
opens properly and locks securely.
| | |
Tail Gate weatherstrip Replacement
| •
|
Do not apply sealant to the
body. | |
| 1. |
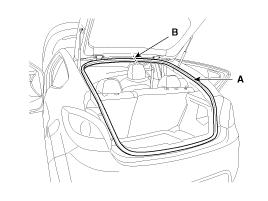
Remove the tail gate weatherstrip
(A).
|
| 2. |
Installation is the reverse of
removal.
| •
|
Install the weatherstrip aligned
with center line
(B). | | |
| 1. |
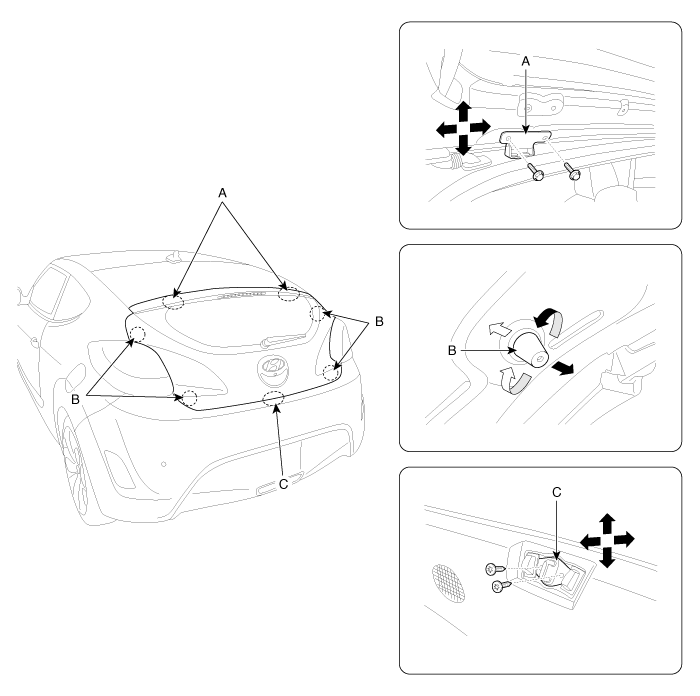
After loosening the tail gate hinge (A)
mounting bolt, adjust the tail gate by moving it up or down, or
right or left. |
| 2. |
Adjust the tail gate height by turning the
tail gate overslam bumpers (B). |
| 3. |
After loosening the tail gate striker (C)
mounting bolts, adjust the tail gate striker by moving it up or
down, or right or left.
|