Outside Rear View Mirror Replacement
| •
|
When prying with a flat-tip screwdriver,
wrap it with protective tape, and apply protective tape around
the related parts, to prevent
damage. |
| •
|
Put on gloves to protect your hands.
| |
| 1. |
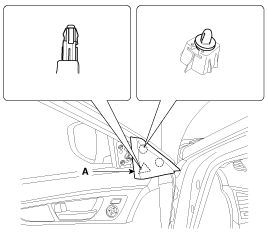
Using a screwdriver or remover, remove the
front door quadrant inner cover (A).
|
| 2. |
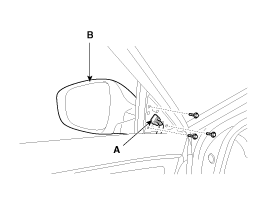
Disconnect the outside rear view mirror
connector (A). |
| 3. |
After loosening the mounting bolts, then
remove the outside rear view mirror (B).
Tightening
torque :
3.9 ~ 5.9 N.m (0.4 ~ 0.6 kgf.m, 2.9 ~
4.3 lb-ft)
|
|
| 4. |
Installation is the reverse of
removal. |
Inside Rear View Mirror Replacement
| 1. |
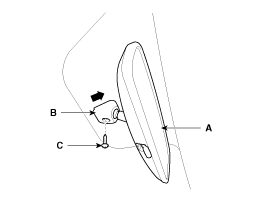
Loosen the mounting screw
(C). |
| 2. |
Push the inside rear view mirror base (B) up
to remove to inside rear view mirror assembly (A).
|
| 3. |
Installation is the reverse of
removal. |
ECM Mirror Replacement
| 1. |
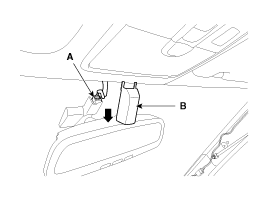
Remove the ECM mirror cover
(B). |
| 2. |
Disconnect the ECM mirror connector
(A).
|
| 3. |
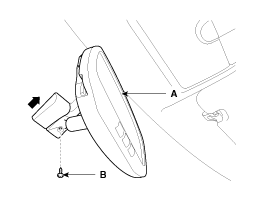
Loosen the mounting screw (B), push the ECM
mirror base up to remove the ECM mirror assembly (A).
|
| 4. |
Installation is the reverse of
removal.
| •
|
Make sure the connector are
connected in
properly. | | |