Floor Console Replacement
| •
|
A plastic trim tool is recommended, but
if prying with a screwdriver, wrap it with protective tape,
and apply protective tape around the related parts, to prevent
damage. |
| •
|
Put on gloves to protect your
hands. | |
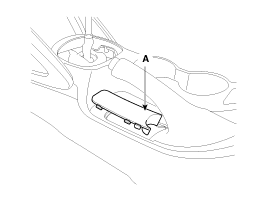
| 1. |
Using a screwdriver or remover, remove the
parking brake cover (A).
|
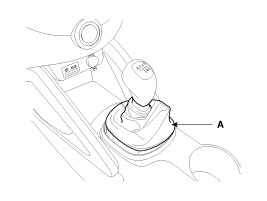
| 2. |
Using a screwdriver or remover, remove the
gear boots (A).
|
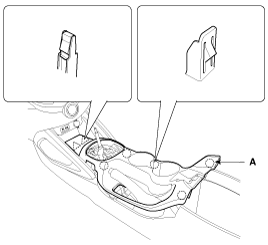
| 3. |
Using a screwdriver or remover, remove the
console upper cover (A).
|
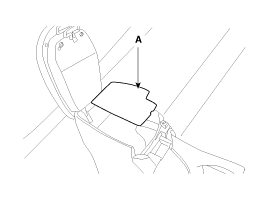
| 4. |
Remove the console tray mat (A).
|
| 5. |
After loosening the mounting screws and bolts,
then remove the floor console assembly (A).
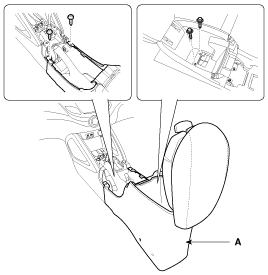
|
| 6. |
After loosening the mounting clips and screws,
then remove the console side cover (A).
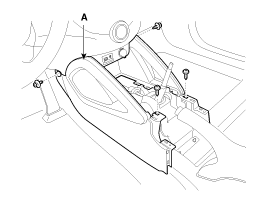
|
| 7. |
Installation is the reverse of
removal.
| •
|
Make sure the connector are
connected in properly. |
| •
|
Replace any damage clips.
| | |
| •
|
A plastic trim tool is recommended, but
if prying with a screwdriver, wrap it with protective tape,
and apply protective tape around the related parts, to prevent
damage. |
| •
|
Put on gloves to protect your hands.
| |
| 1. |
Using a screwdriver or remover, remove the
parking brake cover (A).
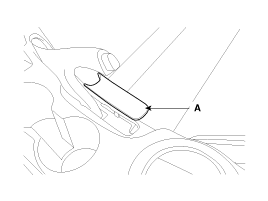
|
| 2. |
Using a screwdriver or remover, remove the
console upper cover (A).
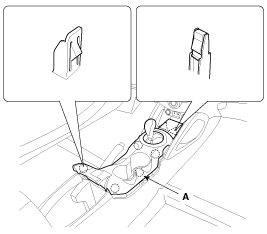
|
| 3. |
Disconnect the connector (A).
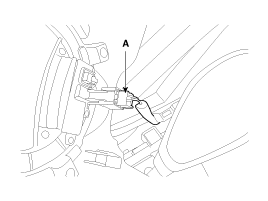
|
| 4. |
Remove the console tray mat (A).

|
| 5. |
After loosening the mounting screws and bolts,
then remove the floor console assembly (A).
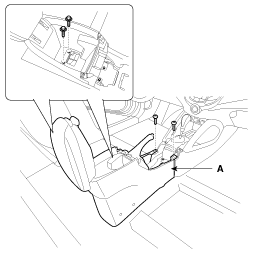
|
| 6. |
After loosening the mounting clips and screws,
then remove the console side cover (A).
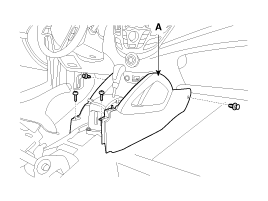
|
| 7. |
Installation is the reverse of
removal.
| •
|
Make sure the connectors are
connected in properly. |
| •
|
Replace any damaged clips.
| | |
Rear Console Cover Replacement
| •
|
A plastic trim tool is recommended, but
if prying with a screwdriver, wrap it with protective tape,
and apply protective tape around the related parts, to prevent
damage. |
| •
|
Put on gloves to protect your
hands. | |
| 1. |
Using a screwdriver or remover, remove the
rear console cover (A).
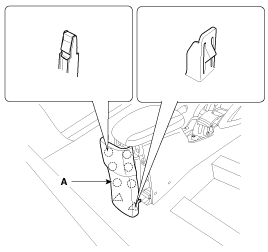
|
| 2. |
Installation is the reverse of
removal.
| •
|
Replace any damage clips.
| | |
Armrest assembly Replacement
| •
|
A plastic trim tool is recommended, but
if prying with a screwdriver, wrap it with protective tape,
and apply protective tape around the related parts, to prevent
damage. |
| •
|
Put on gloves to protect your
hands. | |
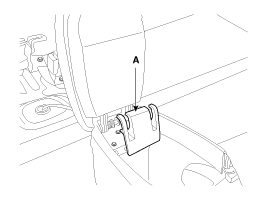
| 1. |
Using a screwdriver or remover, remove the
rear console cover (A).
|
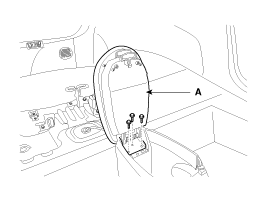
| 2. |
After loosening the mounting screws, then
remove the armrest assembly (A).
|
| 3. |
Installation is the reverse of
removal.
| •
|
Replace any damage clips.
| | |