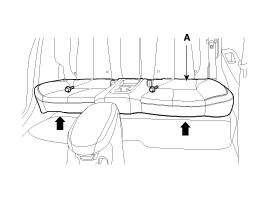
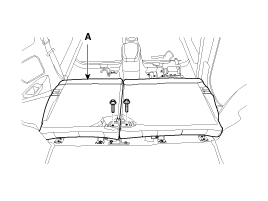
Rear Seat Assembly Replacement
| 1. |
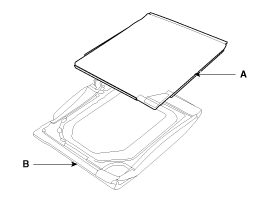
After loosening the mounting bolts, then
remove the rear seat cushion (A).
Tightening
torque :
16.7 ~ 25.5 N.m (1.7 ~ 2.6 kgf.m, 12.3 ~
18.8 lb-ft)
|
|
| 2. |
After loosening the mounting bolts, then
remove the rear seat back (A).
Tightening
torque :
16.7 ~ 25.5 N.m (1.7 ~ 2.6 kgf.m, 12.3 ~
18.8 lb-ft)
|
|
| 3. |
Installation is the reverse of
removal. |
Seat Back Cover Replacement [LH]
| •
|
When prying with a flat-tip screwdriver,
wrap it with protective tape, and apply protective tape around
the related parts your hands. |
| •
|
Put on gloves to protect your hands.
| |
| 1. |
Remove rear seat back
assembly. |
| 2. |
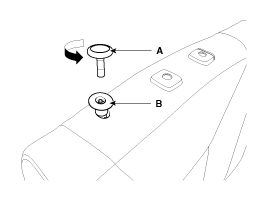
Push the lock pin (B), remove the headrest
(A).
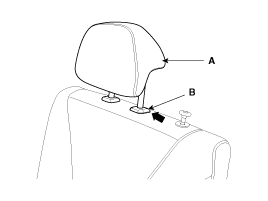
|
| 3. |
Remove the rear seat folding lever (A) after
turning in the counter clock-wise
direction. |
| 4. |
Remove the rear seat folding lever cover
(B).
|
| 5. |
After loosening the mounting screws, then
remove the rear seat latch cover (A).
|
| 6. |
Using a screwdriver or remover, remove the
rear seat side bracket cover (A).
|
| 7. |
Push the protecter (B) by the rear seat back
panel (A).

|
| 8. |
Using a screwdriver or remover, remove the
rear seat back panel (A).
|
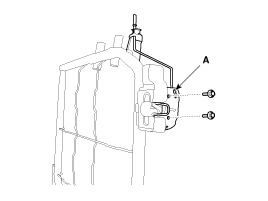
| 9. |
Disconnect the protector (A).
|
| 10. |
Remove the rear seat back panel (A) from the
rear seat back frame (B).
|
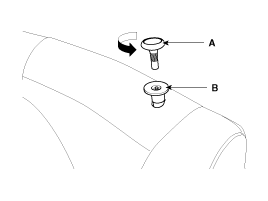
| 11. |
Pull out the headrest guides (A) while
pinching the end of the guides, and remove them.

|
| 12. |
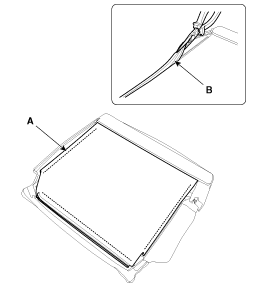
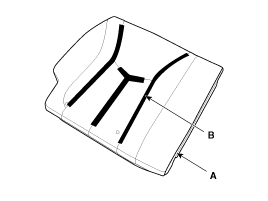
Remove the rear seat back cover from the rear
seat back frame. |
| 13. |
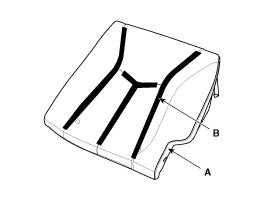
After removing the velcro tape (B) on the rear
of seat back and remove the seat back cover (A).
|
| 14. |
Installation is the reverse of
removal.
| •
|
Replace any damage clips.
| | |
Rear Seat Latch Replacement [LH]
| •
|
When prying with a flat-tip screwdriver,
wrap it with protective tape, and apply protective tape around
the related parts your hands. |
| •
|
Put on gloves to protect your hands.
| |
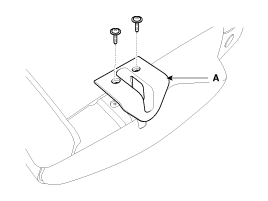
| 1. |
Remove the following items first.
|
| 2. |
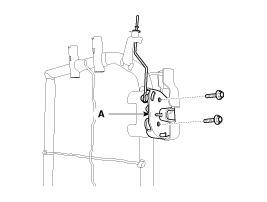
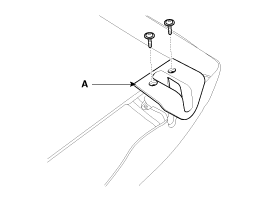
After loosening the mounting bolts, then
remove the rear seat latch assembly (A).
|
| 3. |
Installation is the reverse of
removal.
| •
|
Replace any damage clips.
| | |
Seat Back Cover Replacement [RH]
| •
|
When prying with a flat-tip screwdriver,
wrap it with protective tape, and apply protective tape around
the related parts your hands. |
| •
|
Put on gloves to protect your
hands. | |
| 1. |
Remove rear seat back
assembly. |
| 2. |
Push the lock pin (B), remove the headrest
(A).

|
| 3. |
Remove the rear seat folding lever (A) after
turning in the counter clock-wise
direction. |
| 4. |
Remove the rear seat folding lever cover
(B).
|
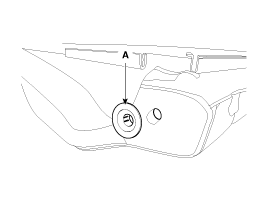
| 5. |
After loosening the mounting screws, then
remove the rear seat latch cover (A).
|
| 6. |
Using a screwdriver or remover, remove the
rear seat side bracket cover (A).
|
| 7. |
Push the protecter (B) by the rear seat back
panel (A).
|
| 8. |
Using a screwdriver or remover, remove the
rear seat back panel (A).
|
| 9. |
Disconnect the protector (A).

|
| 10. |
Remove the rear seat back panel (A) from the
rear seat back frame (B).
|
| 11. |
Pull out the headrest guides (A) while
pinching the end of the guides, and remove them.
|
| 12. |
Remove the rear seat back cover from the rear
seat back frame. |
| 13. |
After removing the velcro tape (B) on the rear
of seat back and remove the seat back cover (A).
|
| 14. |
Installation is the reverse of
removal.
| •
|
Replace any damage clips.
| | |
Rear Seat Latch Replacement [RH]
| •
|
When prying with a flat-tip screwdriver,
wrap it with protective tape, and apply protective tape around
the related parts your hands. |
| •
|
Put on gloves to protect your hands.
| |
| 1. |
Remove the following items first.
|
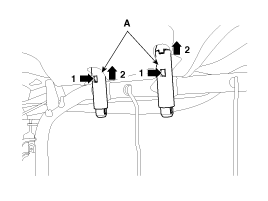
| 2. |
After loosening the mounting bolts, then
remove the rear seat latch assembly (A).
|
| 3. |
Installation is the reverse of
removal.
| •
|
Replace any damage clips.
| | |
Rear Seat Cushion Cover Replacement
| •
|
When prying with a flat-tip screwdriver,
wrap it with protective tape, and apply protective tape around
the related parts your hands. |
| •
|
Put on gloves to protect your hands.
| |
| 1. |
Remove the following items first.
| A. |
Rear seat cushion
assembly | |
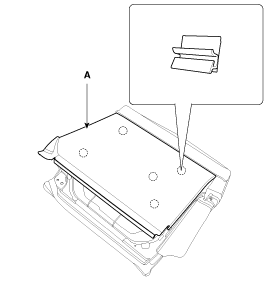
| 2. |
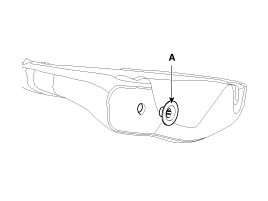
After loosening the mounting screws, then
remove the rear seat cup holder panel assembly (A).
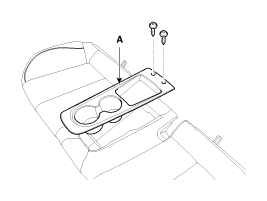
|
| 3. |
Remove the mounting clips (A).
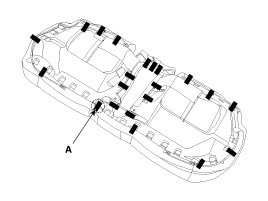
|
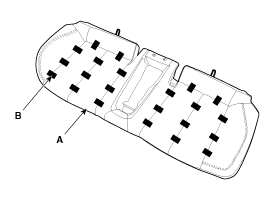
| 4. |
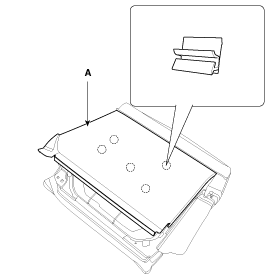
After removing the hog-ring clips (B) on the
rear of seat cushion and remove the seat cushion cover
(A).
|
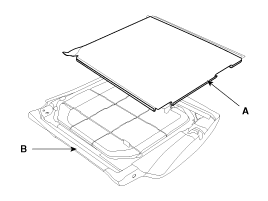
| 5. |
Installation is the reverse of
removal.
| •
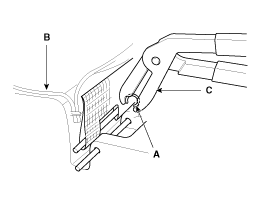
|
To prevent wrinkles, make sure the
material is stretched evenly over the cover (B) before
securing the hog-ring clips
(A). |
| •
|
Replace the hog-ring clips with
new ones using special tool [C (09880-4F000)].
| |
|