| 1. |
Turn the ignition switch OFF and disconnect
the battery negative (-) cable. |
| 3. |
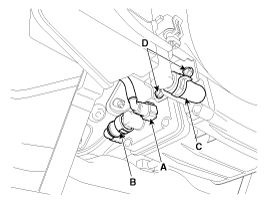
Disconnect the vapor tube quick-connector
(A,B) and the ventilation hose (C). |
| 4. |
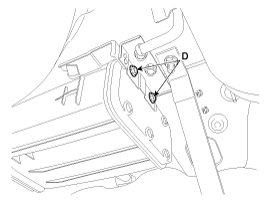
Remove the canister assembly after removing
installation bolts (D).


|
| 1. |
Check for the following items
visually.
- Cracks or leakage of the
canister
- Loose connection, distortion, or damage of
the vapor hose/tube

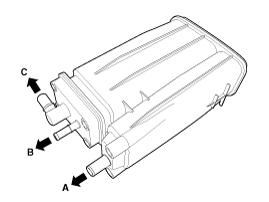
A: Canister ↔ Atmosphere (Fuel tank air
filter)
B: Canister ↔ Intake manifold
C: Canister ↔ Fuel tank
|
Installation is the
reverse of removal.
Canister bracket
installation bolt:
19.6 ~ 29.4 N.m (2.0 ~ 3.0 kgf.m, 14.5 ~ 21.7
lb-ft)
Canister
installation bolt:
3.9 ~ 5.9 N.m (0.4 ~ 0.6 kgf.m, 2.9 ~ 4.3
lb-ft)
|