| 1. |
Disconnect the battery negative
terminal. |
| 2. |
Loosen the mounting bolts (A) and then, turn
the adjusting bolt (B) clockwise to loosen tension.
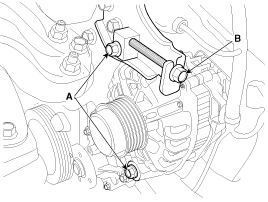
|
| 3. |
Remove the drive belt (A).
|
| 4. |
Disconnect the air compressor connector (A)
and the alternator connector (B), and remove the cable from
alternator "B" terminal (C).
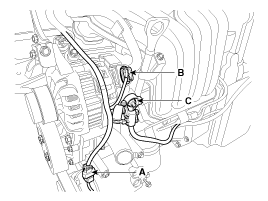
|
| 5. |
Remove the alternator (A).
|
| 1. |
Install in the reverse order of removal.
|
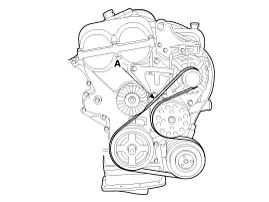
| 2. |
Adjust the alternator belt tension after
installation.
(Refer to Engine Mechanical System - "Drive
Belt")
Alternator
installation bolt:
[12mm (0.47in) bolt]
19.6 ~ 26.5 Nm (2.0 ~ 2.7 kgf.m, 14.5 ~
19.5 Ib-ft)
[14mm (0.55in) bolt]
29.4 ~ 41.2 Nm (3.0 ~ 4.2 kgf.m, 21.7 ~
30.4 Ib-ft)
| |
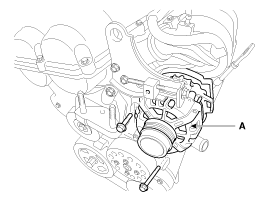
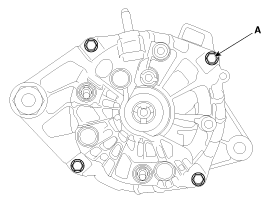
| 1. |
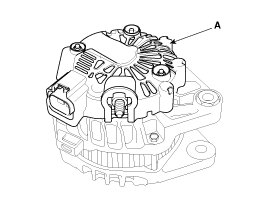
Remove the rear cover (A) after removing
nuts.
|
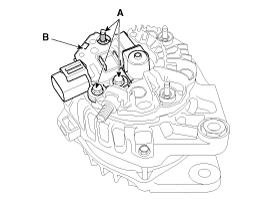
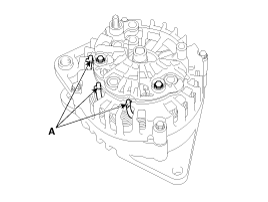
| 2. |
Remove the mounting bolts (A) and the brush
holder assembly (B).
|
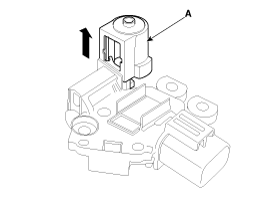
| 3. |
Remove the slip ring guide (A) after pulling
it.
|
| 4. |
Remove the OAD(Overrunning Alternator
Decoupler) cap.
| •
|
When installing, replace with new
OAD cap.
| | |
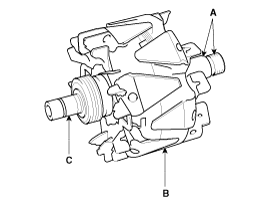
| 5. |
Remove the OAD(Overrunning Alternator
Decoupler) pulley (A) using the special tool.
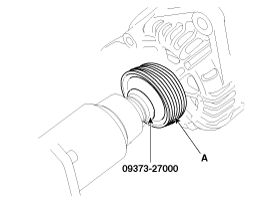
|
| 6. |
Unsolder the 3 stator leads (A).
|
| 7. |
Remove the 4 through bolts (A).
|
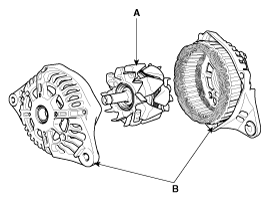
| 8. |
Disconnect the rotor (A) and bracket
(B).
|
| 1. |
Reassemble in the reverse order of
disassembly.
| •
|
When reassembling OAD pulley,
replace with new OAD
cap. | | |
| 1. |
Check that there is continuity between the
slip rings (C).
|
| 2. |
Check that there is no continuity between the
slip rings and the rotor (B) or rotor shaft
(A). |
| 3. |
If the rotor fails either continuity check,
replace the alternator. |
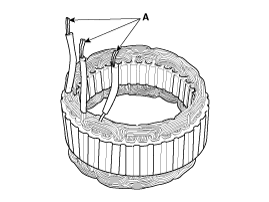
| 1. |
Check that there is continuity between each
pair of leads (A).
|
| 2. |
Check that there is no continuity between each
lead and the coil core. |
| 3. |
If the coil fails either continuity check,
replace the
alternator. | |